Messier 27 in Narrowband Using Drizzle
June 2017
Messier 27
(Dumbbell Nebula) is one of the most popular Summer Objects.
Using filters its bright O III emission is easy to show even with a
first quarter moon. I have seen pictures in Narrowband of this
object and was curious to see what I could do on my own.
Since this object is rather small (8.0' × 5.6') for my wide field setup
this was an opportunity to try the Drizzle Algorithm that was included in PixInsight
last year. I will let you follow the links for a complete explanation,
but here is the Cliff's Notes. For large pixel cameras like mine
I lose resolution. Since I also dither (moving the camera between
images) as a noise reduction technique, some of the addition resolution
can be recovered using Drizzle. Normally expanding an image 2X
will pixelate an image. Using Drizzle I can mostly avoid
this. Thus instead of a 3.5" pixel I have closer to 1.75"
resolution which allows me to see finer detail.
I was originally going to do this project as a classical SHO (Hubble
Palette). The Sulfur signal was rather weak though. Instead
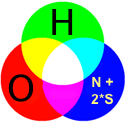
of over stretching it I decided to gather Nitrogen and then combine the
Nitrogen with the Sulfur multiplied by 2 instead of by 5 as I was doing
with pure Sulfur. I also mapped Oxygen to Red rather than Blue since I
liked the resulting colors better. I decided that the resulting image
was balanced and did not do further channel balancing.
Note the jet of Hydrogen/Nitrogen. Note also the distinct ring
around the edge of the bright nebula and the structures inside.
With this image M27 looks more like a classical planetary nebula.
Drizzle x2

|
Non Drizzled Image

|

|
There are a couple of things that I notice from the processed
image. First is the halo of Oxygen. This is not visible
when viewing with your eyes likely because it is too dim.
The second is the classical Dumbbell shape is not visible. That
is likely a processing artifact as I demonstrate below. Our eyes can detect
many levels of brightness. With a camera I can only display a
limited range of brightnesses. The tools that I use to select
that range have a preference for edges. Thus they tend to detect
and enhance structures (like the fine detail seen where the dumbbell is
usually seen). Only the Sulfur image showed something like what
is seen visually. These are the original images for each filter
stretched to make the nebula visible.
Recovering
the Dumbbell
As I said above the enhancement techniques I usually use bring out
edges. This is important to show fine structure detail like the
turbulence of an expanding gas cloud. To get something closer to
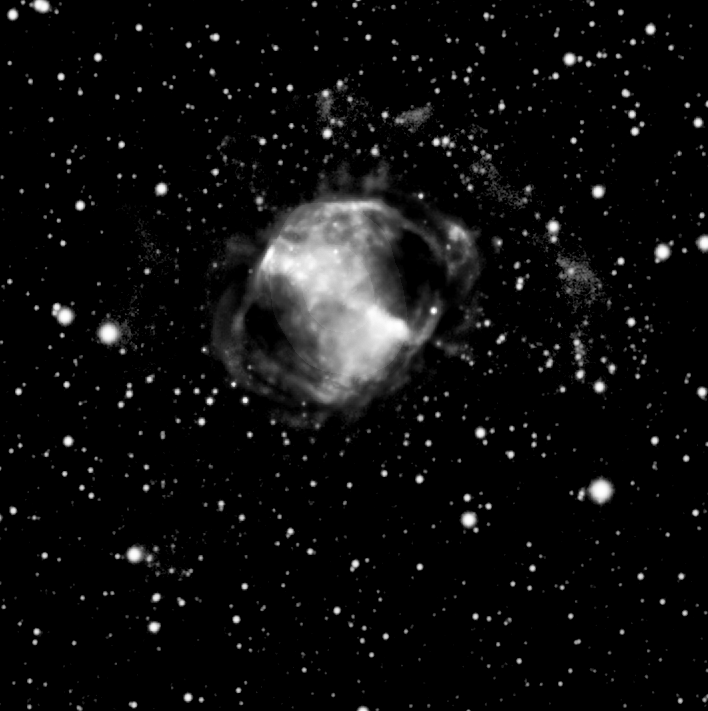
how our eyes worked I took the Hydrogen image and applied
LocalHistogramEqualization. PixInsight provides this description
of the algorithm.
Histogram equalization takes the
histogram and computes a transfer curve, which grants more brightness
range to higher histogram peaks and less brightness range to histogram
valleys. In other words, large areas of similar brightness get more
contrast. Local histogram equalization works on individual pixels and
computes a transfer curve from the histogram of a pixel neighborhood.
LocalHistogramEqualization brings out the classical shape

Nitrogen vs Hydrogen
On first glance the Nitrogen and Hydrogen images are similar. To
prove I was actually capturing something different I created this
image. Red in this case are areas were there is more
Nitrogen. Green are areas where there is more Hydrogen

Clearly the distributions are different which validates that the
filters are recording something different.
Processing Details
Data Collection was fairly routine. My guide camera failed so I
had to capture this project using my AP1100 AE only using APCC Pro
tracking. Few images had to be tossed due to Eccentricity which
shows how good the tracking is. The resulting image was rather
noisy and would have benefited from another 5 good images of each
filter. Unfortunately I ran out of time.
Filter
|
Exposure
|
#
Images
|
Hydrogen
(3nm)
|
900
|
15
|
Oxygen
|
900
|
15
|
Sulfur
|
900
|
19
|
Nitrogen
|
900
|
20
|
All images were processed by
Pixinsight.
Most of the processing was for noise reduction. To tease the
structure out of the bright central block I used "Gaussian (5)"
HDRMultiscaleTransform. This is a method I have not used before.
The other transforms resulted in an image that looked overprocessed.
I built nebula masks using MLT residual layer and then clonestamped out
the large stars.
TGVDenoise was used in both the linear and non linear phases to manage
noise.
Copyrights For Photos

(c) 2017 Robert J Hawley.
Except as noted,all work on this site by Robert J. Hawley is
copyrighted under a Creative
Commons Attribution-Noncommercial-Share Alike 3.0 United States License.
This permits the non commercial use of the material on this site,
either in whole or in part, in other works provided that I am credited
for the work.


